Excited to start crafting and doing something with my sister, I actually wasn't excited to start this project. Though we both chose it, I wasn't confident my end product would be something to be proud of. If anyone knows me, when it comes to my crafting/ art skills I'm a perfectionist. If it doesn't meet my approval fully it goes against my grain to show it to the world. People have waited several years before getting a final product from me whether it be photos or crochet. This challenge is forcing me to get out of that habit and just do it.
 |
| Becky got the idea from Pinterest |
When my sister gave me a sleigh shaped gift with all kinds of little things wrapped inside I was intrigued to find what was beyond all the pretty paper. The sleigh body was constructed from a jello box and two candy canes for skis. It was affixed with tape to a poly-fill laced card. The sleigh was filled with strategically wrapped items. Becky had been so meticulous to wrap the items with the pictures from her gift wrap; snowman, Santa... and pieces of candy for filler. The whole thing was tied with recycled ribbon I had wrapped one of her gifts with many moons ago. My sister, like myself, doesn't throw much that is useful away. I unwrapped each item; glue stick, bobbin from a sewing machine, mini Shrinky Dink kit, leather thimble, Super Glue, mini screw driver and mini flower-shaped cookie cutters. Then came the card. Inside was the story behind all the little items, her idea of a Pinterest Challenge. Oh, you should have seen my delight as my mind was full of ideas for our new adventure. She also was so kind to give me a gift card to which went into buying a table, chair and some storage totes for a work area I set up in my bedroom.
 |
| Table, chair, two lights and all the fixin's. |
I am very thankful to have a sister and especially a sister equally creative as myself. Over the past three months we've talked via phone, text, Skype, Xbox, Facebook and e-mail. I think we've talked more now than when I lived in Pennsylvania. I know I didn't want to loose touch with some of the closest family I've had in my 32 of life. Every time I sit in my work area I think of Becky, nieces and nephew. Never in my wildest dreams I thought I would ever move away from Pennsylvania. Now that I have, it means so much to me to keep close what I hold so dear, Becky and her children.

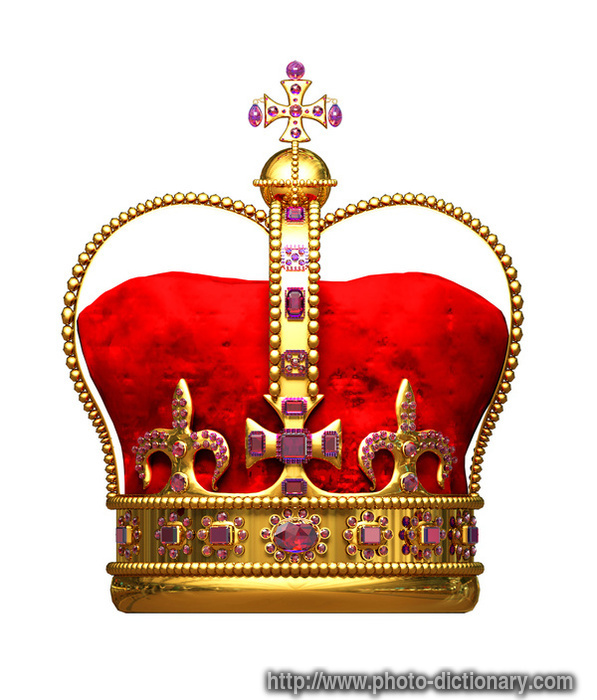
Alright, enough of the mushy stuff. This is how I made my crown. I first started with cardboard and rubber cement. Pictured left I added vertical strips of card board to make a crown using red velvet I had from a tree skirt that I don't use anymore. Basically something like the picture on the right. Well when I got into adding recycled aluminum from soda cans it all went downhill from there. The aluminum didn't adhere well and the glue made the crown look yucky. It would have taken a TON of work and well... I was pretty frustrated. So I took it and put it in the recycle bin. Never fear, there's always a back up plan. Initially I was going to use wire since I had a whole spool of it. I should have gone with my original idea huh?
 |
| All the materials and tools I used for the crown. |
|

Crochet is something I've done a lot of. I thought it was going to be easy, but is anything I do ever easy? The wire I bought to put up an art line in the girls rooms. We hang their artwork from those lines and the one that came with the kit I bought from Ikea wasn't long enough to reach across their rooms. The spool of wire was the cheapest thing I could get that was thin enough to work. Needless to say, I had a ton left over. Knowing how I use things, it will come in handy later. Crocheting with it isn't incredibly easy. 24 gauge wire is pretty thick wire for crocheting. Since it was the only thing I had, I made it work. My hands also didn't like working with it. They felt like ground meat. I got used to it and limited my time to give my hands a break. Pliers aided pulling wire through and shifting the crown around. I also used a size G6/ 4.25MM crochet hook to make the crown. Before starting each point I alternated clear and red beads to add beaded accents as I crocheted. As Pinterests logo is red and white I went with those colors going with the logo theme. I ended each point to the crown with a line of beads, zig-zaggy wire and a clear faceted bead at the end of each point. It took me about 20-30 minutes per point, 8 points total. After I was finished with each point I added a wire string of beads laced through the center of each point to give them more stability and decoration. The points were a little floppy before I did that. I also sewed wire around the base to give the piece more weight and stability. After all that was done I was a little lost as to how to incorporate the Pinterest Logo. As this was a Pinterest inspire challenge, it was a rule we made to incorporate the logo somehow in our crowns. I almost didn't want to add the logo as I like my crown as it was. A day before we had to show our crowns I made a zig-zaggy, beaded logo spire that I place between two of my crowns points. The logo was printed paper I cut out and stuck a clear plastic bubble sticker on top to give it more substance. I bought those for making picture charm bracelets awhile back. There you have it. Once completed crown and two raw hands. I am pretty proud of my piece and my kids loved it too. Emma's friend was pretty excited to see my work as she is learning knitting. I could see the cogs spinning in her head thinking bout the limitless possibilities her new craft can take her. This whole project was worth it alone inspire our kids to take your craft off-roading. Knitting and crocheting isn't only for yarn and string.


 Crochet is something I've done a lot of. I thought it was going to be easy, but is anything I do ever easy? The wire I bought to put up an art line in the girls rooms. We hang their artwork from those lines and the one that came with the kit I bought from Ikea wasn't long enough to reach across their rooms. The spool of wire was the cheapest thing I could get that was thin enough to work. Needless to say, I had a ton left over. Knowing how I use things, it will come in handy later. Crocheting with it isn't incredibly easy. 24 gauge wire is pretty thick wire for crocheting. Since it was the only thing I had, I made it work. My hands also didn't like working with it. They felt like ground meat. I got used to it and limited my time to give my hands a break. Pliers aided pulling wire through and shifting the crown around. I also used a size G6/ 4.25MM crochet hook to make the crown. Before starting each point I alternated clear and red beads to add beaded accents as I crocheted. As Pinterests logo is red and white I went with those colors going with the logo theme. I ended each point to the crown with a line of beads, zig-zaggy wire and a clear faceted bead at the end of each point. It took me about 20-30 minutes per point, 8 points total. After I was finished with each point I added a wire string of beads laced through the center of each point to give them more stability and decoration. The points were a little floppy before I did that. I also sewed wire around the base to give the piece more weight and stability. After all that was done I was a little lost as to how to incorporate the Pinterest Logo. As this was a Pinterest inspire challenge, it was a rule we made to incorporate the logo somehow in our crowns. I almost didn't want to add the logo as I like my crown as it was. A day before we had to show our crowns I made a zig-zaggy, beaded logo spire that I place between two of my crowns points. The logo was printed paper I cut out and stuck a clear plastic bubble sticker on top to give it more substance. I bought those for making picture charm bracelets awhile back. There you have it. Once completed crown and two raw hands. I am pretty proud of my piece and my kids loved it too. Emma's friend was pretty excited to see my work as she is learning knitting. I could see the cogs spinning in her head thinking bout the limitless possibilities her new craft can take her. This whole project was worth it alone inspire our kids to take your craft off-roading. Knitting and crocheting isn't only for yarn and string.
No comments:
Post a Comment